Editing
In this
stage of my development I am in the post-production, which means editing. In
this project I haven't had to edit as much as I have had to I the past. To edit
my photographs I used Adobe Photoshop Sc6.
 |
| Adjusting to Black and White |
The first
thing I did was crop my photographs, taking out a most of the access background
and little bits of the bottom. I then started off with the first of the seven
photographs, this would be of the models being the sleepiest and tired of the
seven photographs. I then changed this image to black and white. I did this by
going to “Image”, “Adjustments” and “Black and White” I then adjusted the
colours (as shown in the photograph to the right) to be the best they could be
in black and white.
 |
| Adjusting the Saturation |
I then went
onto the second photograph of the seven. With this photograph I had to be
slowly proceeding the image from black and white to colour. By the time it
comes to the seventh photograph it will be in vivid colour. To change the
photograph from black and white to colour, I had to change the saturation. “To
do this I would have to go to “Image”, “Adjustments” and “Hue/Saturation” (As
shown in the photograph to the left). I did this to each of the photographs
that were left, taking the saturation up a little each time, bring it to
colour. Until I came to the seventh photograph which would have to the bold and
brightest.
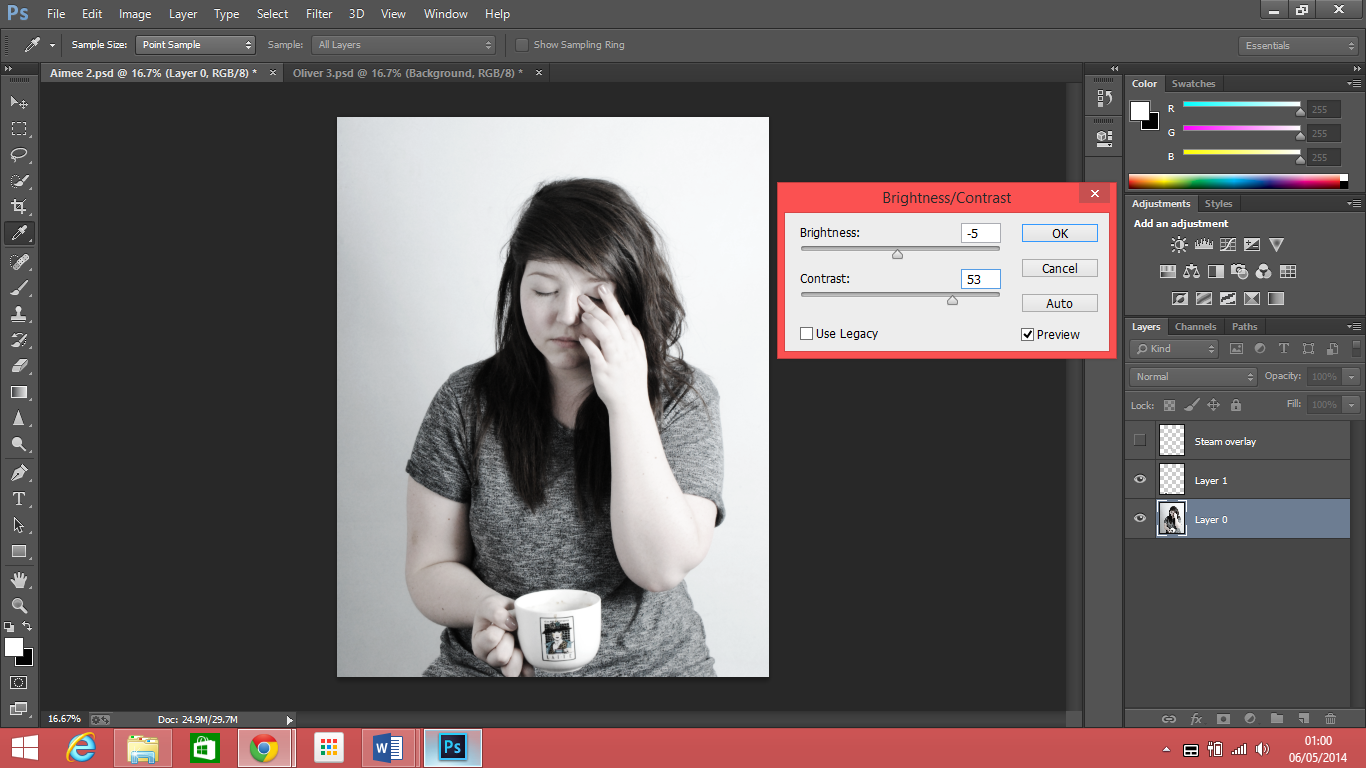
 It then came
to adjusting the brightness and contrast of the photograph. To do this you go
to “Image”, “Adjustments” and “Brightness/Contrast” I then put the contrast up
quite a lot and put the brightness up or down according to the photograph. As
the model becomes more awake, all the colours, brightness and contrast goes up
with the mood of the person.
The last of the
editing process would be adding the steam coming out of the coffee mug. I would
say this was most difficult and time consuming task of the editing. I had to
learn how to add in the steam via YouTube video https://www.youtube.com/watch?v=ZDbJCsTGYoA&list=WLC2FCJV0yYPdopqblMlXfig&index=139
It was difficult getting the right shape of the steam and making it look
realistic as if it were there and not fake. To make the steam, I had to select “Create
a New Layer” naming it steam then using the “Brush” tool keeping the opacity
down, I started brushing in wavy lines to create the steam’s shape. I found
this task the hardest of them all as it takes a few tries to get the perfect
combination of strokes. Using different sized brushes that overlapped each
other was a good way to get the right combination, as it works really well. Clicking on “Ctrl+t” and then “Warp” tool will
help move the brush strokes around adjusting it to the way you like, I did this
until the shape I wanted was perfect. After that I went to “Filter”, “Other”
and “Maximum” it immediately starts
looking more like steam, I choose the 12 pixels and clicked ok. I wanted to add
filters to the steam, to allow me to make changes to the filters I was going to
add, I first had to instruct the steam layer to accept smart filters. To do
this I went on “Filters” and then “Convert for Smart Filters”. To soften up the
steam and add some atmosphere, I went to “Filter”, “Blur” and “Surface Blur”, I
used a “Radius” of 85 and a “Threshold” of 81. After adding a new layer, I went
to “Filter”, “Render” and then “Clouds” I then re-titles that layer Steam
overlay and changed the mode from “Normal” to “Overlay”. That is how I created
the steam to my coffee. It may be a long and time consuming process, but it’s
worth the effort as the results turned out great.
I then had to repeat each of these four stages of editing to all of my seven photographs of my four models, in order to have my final photographs.

No comments:
Post a Comment